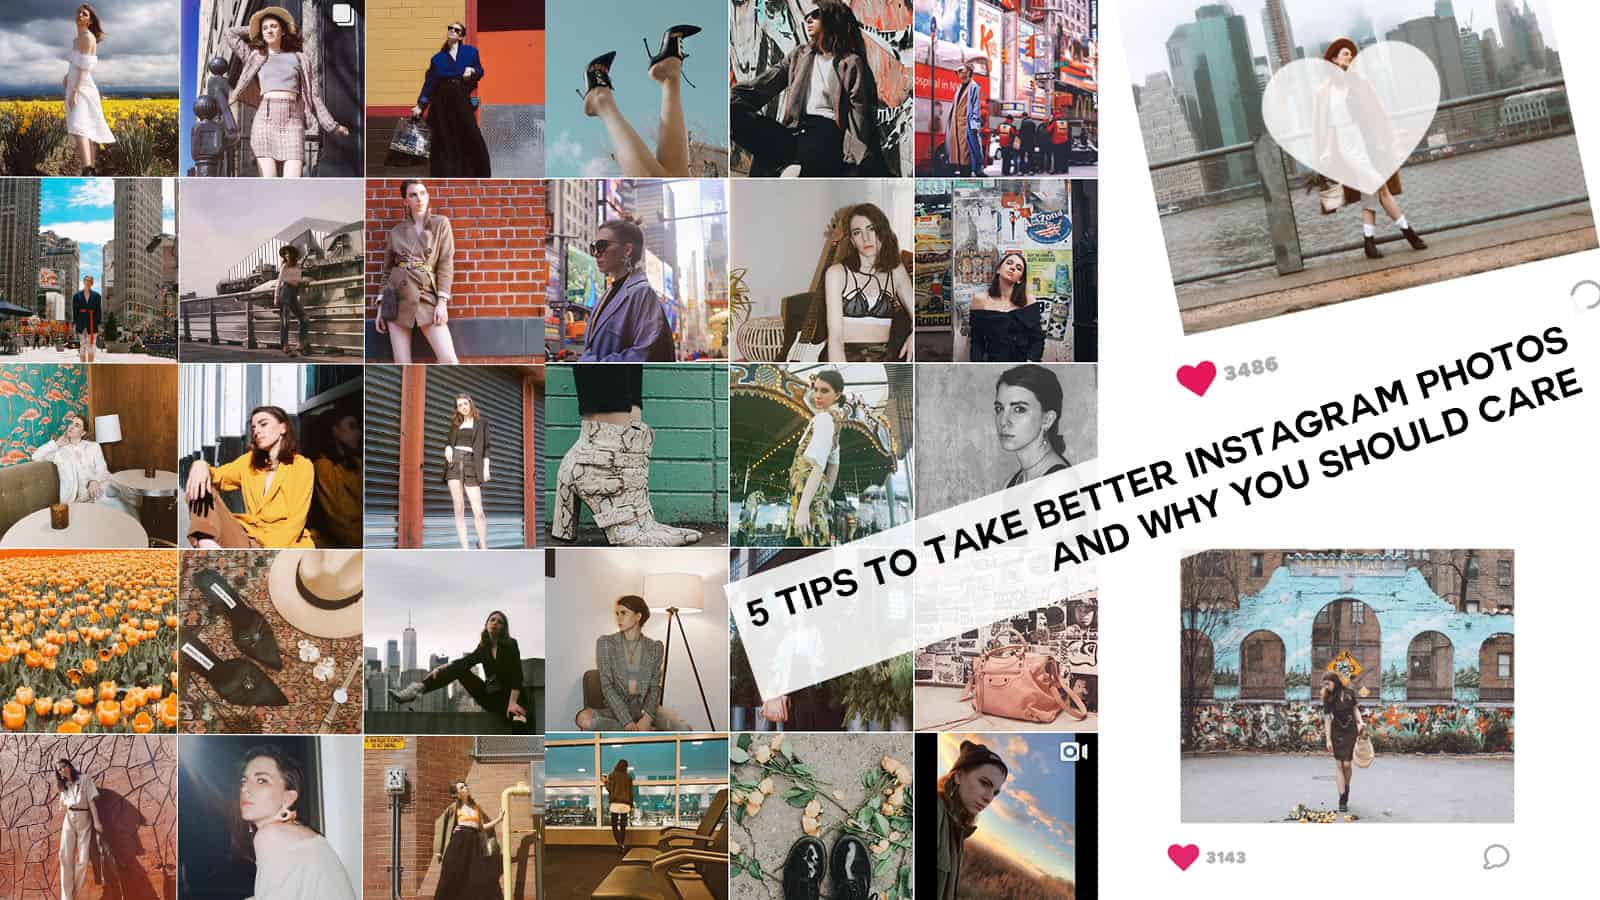
You really need to take better pictures for instagram.
Ok, so a lot of you may have been casual Instagram users and are slowly trying to shift to a more professional, curated feed. However, these tips can be applied to the nuanced social media maven and the amateur. They are basic tips that will help you improve the way you take photos and in turn produce better, more “ gram worthy” shots. In turn, being able to take better pictures for Instagram will have a more dramatic effect than you might have imagined- plus, it’s much easier than you think.
So- I know Instagram prides itself on sharing in real time.. That is their preferred method of posting, however, most people don’t do this. And if they do they end up with a mixed bag feed that feels haphazard and unrefined. And you may be saying- well I don’t use Instagram as a “professional”- totally valid. BUT! The world uses Instagram to get to know you, that’s an undisputed fact.
Imagine yourself walking into a conference, a casual event, or even a party… You start to mingle and engage in a conversation with someone. Usually the first question (outside of your name)- is what do you do.. The second- do you have Instagram? Why is Instagram so powerful? Because it communicates to the world (much like your fashion) your visual diary in one click. It lets people know your values, your style, your interests, and dislikes all in one fell swoop. It’s kind of like a cheat sheet. So being able to take better pictures for Instagram- is empowering your image to anyone who graces your feed.
So- now that we have landed that Instagram is important whether it is a business venture or not. The photos within your grid should reflect you.
I don’t know how many times people have commented on things I haven’t personally told them but I told the world on Instagram. That means, my message is getting across. Someone commenting on my perspective when having never discussed it with me- is amazing. We just skipped my elevator pitch and went straight to the heart of the issue. Score one for me.
So- use Instagram to curate your persona. It should be a combination of who you ARE and who you want TO BE. It can be real while still having a point of direction.
I’m not saying to avoid posting silly photos or photos that you like. That is all the stuff that should be on Instagram- but here is how to take the original photo in a way that makes it more beautiful, and have more resonation power than the haphazard way you were doing it before.
They are simple tips, that won’t add hours to your photo taking process.
So let’s start-
1. Composition-
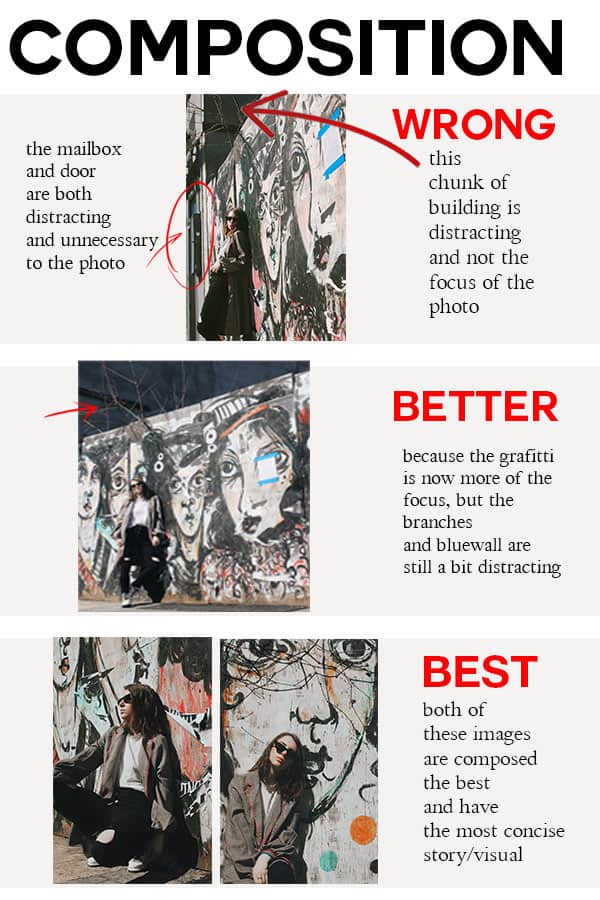
When we are taking a photo we have a strategic goal in mind.. Oh, my kid looks so cute right now I just want to get a photo of him. WRONG! What you should be thinking about is the full photo… Your kid already looks cute- he will cute no matter what. So look at your surroundings and what is in and outside the frame of your photo. Is there a pile of clean laundry stacked to the left that if you shift the camera over a bit you will edit out? Is there a distracting element that will take the focus away from your child- (like a big branding element or overbearing element)?
As a photographer, you are allowed to move around your subject. It’s allowed… So while your kid is looking extra cute right now, try moving around him to get the best composition possible. That is how a photo that communicates your goal is taking.
2. Cropping
Every artist knows the rules of thirds. And I am here to tell you what it is. It is part two of the previous step. The composition was on point, the kid is looking super cute, but what makes a photo go from an 8 to a 10? Cropping. The rule of thirds breaks down as follows. Look at your photo like a grid, broken up into three vertical and horizontal spaces. As shown below.
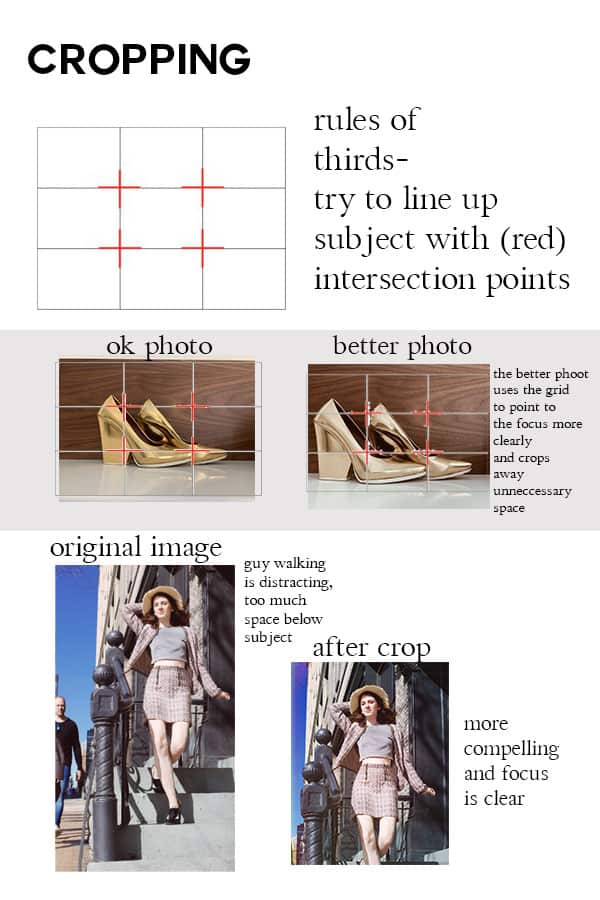
Now try to have your subject ( the goal of your image) – in this instance your child- be in on the three quadrants/junction points (see red intersections). Cropping your photo to be truncated into visual thirds will not only make it more visually powerful, but it can also eliminate things within your photo that are not helping you tell your story.
Be mindful of where you crop. Do not amputate your subjects. Try to not cut off people at the wrist or ankles.
3. Color
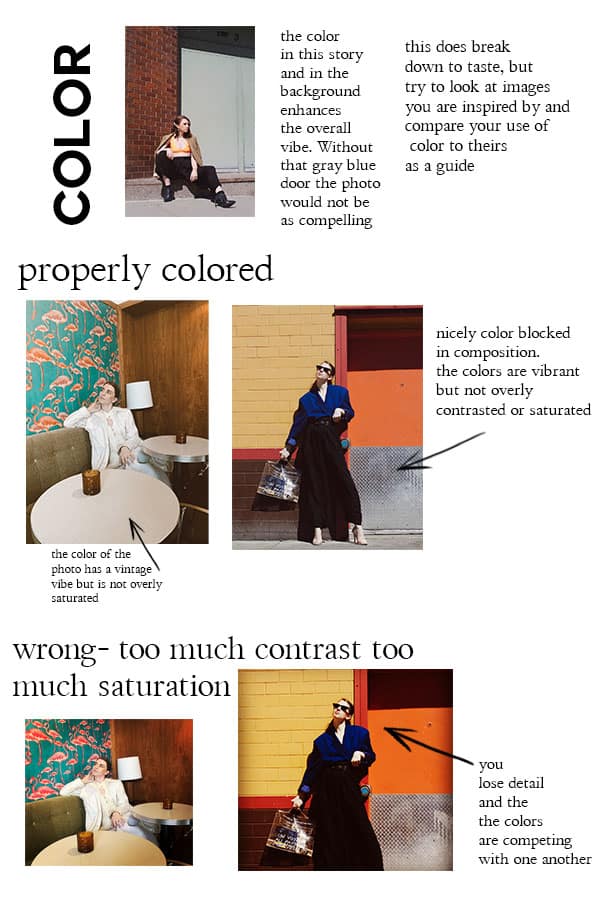 Color and photos work hand in hand. Yes, even with black and white photos. Now, of course, you can color correct your photos after you shoot to fix any issues you may be having… But to avoid this, try looking at the color within your photo and using it to help you compose a photo. Why is the below photo so successful? Because the play on color helps communicate the story of my outfit. Look at your composition and decide how you want to use color to help you communicate. Is it about your cute kid in a red shirt with a red piece of candy? Photos with direct color concepts do the best.
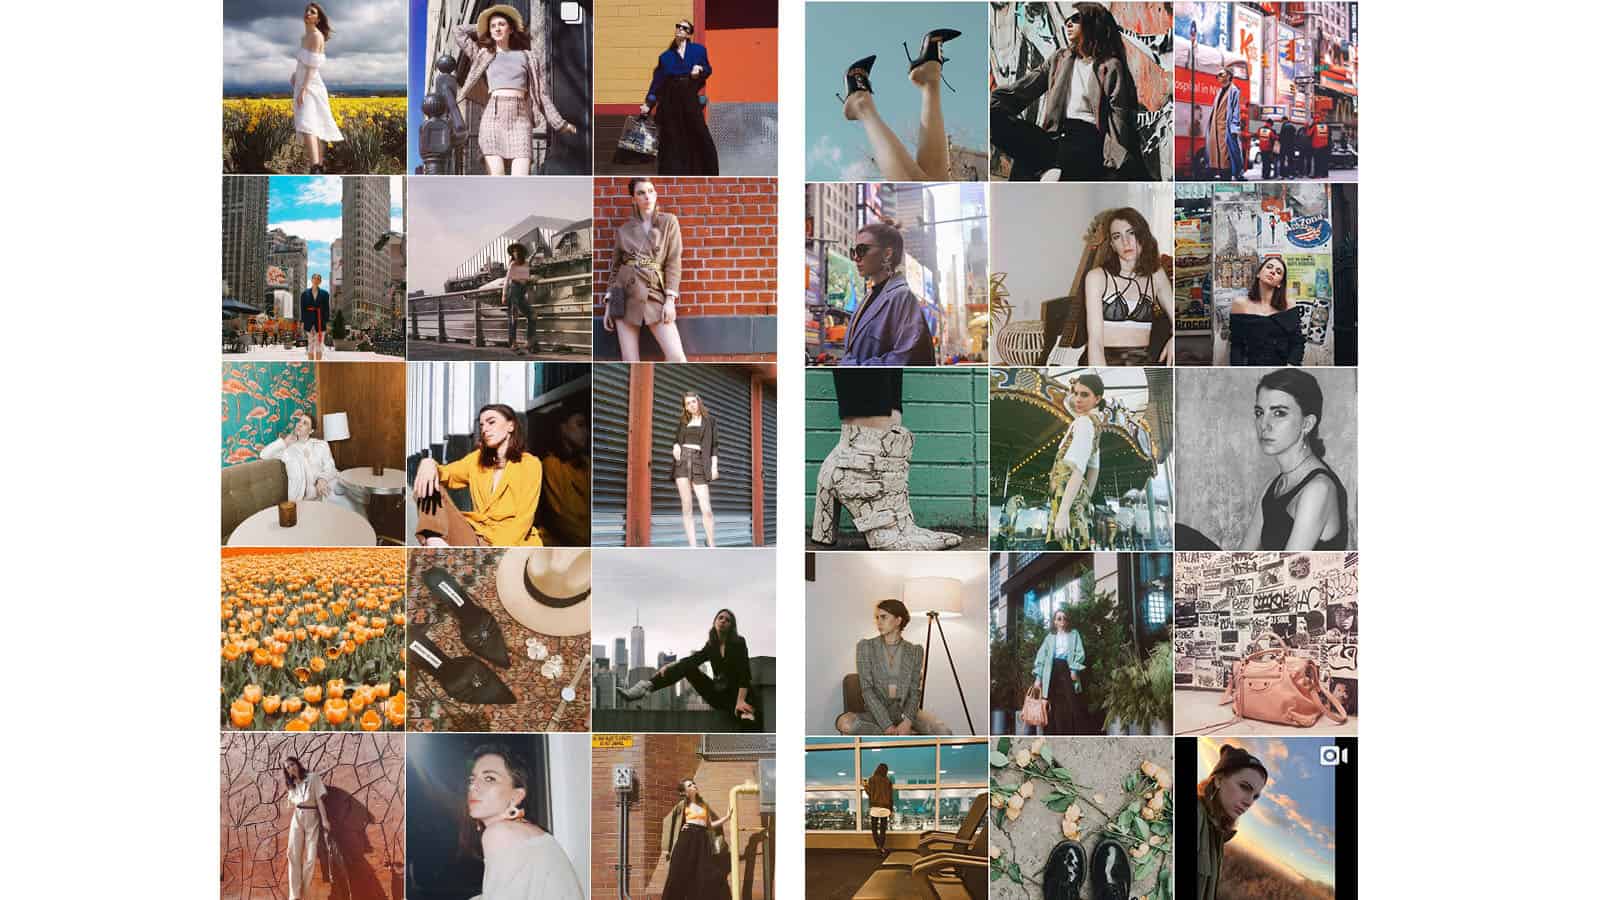
Your color concept is something you have to pick and stay true to. That does not mean you can’t shoot bright colors, muted colors, and vintage colors. What it means is committing to a preset (not an Instagram filter!!!) that communicates your vibe. People who take Instagram seriously for their business know the importance of the “Grid”. The most recent 9 photos that someone sees when they come to your page. These photos are your first impression. You want them to look like this – purposeful. As you can see my grid has a variety of shots, styles, and composition. They are not all full length, they are not all close up, they are not all of me, but they all seem to be friendly color wise.
So while composing a photo with color in mind gets you half of the way there… if you want to take your grid seriously you will invest in a preset set that you like.
In most cases, a preset is a series of adjustments that are applied to an image in 1 click, settings that you have used before to tweak your images, now you just want a 1 click button to apply all of them as they are.
A filter in software is usually an adjustment or set of adjustments that are applied but manipulated with sliders to adjust the effect they have on the image, possibly saving the result as a preset for use later on.
A filter on a lens changes the exposure of the image based on what the filter does, such as, a Neutral Density filter reduces the amount of light entering the lens to allow longer shutter speeds.
One click editing sounds great, but certain considerations need to be made aware in order to take better pictures for Instagram. Too much contrast or too much stark coloring can appear dated and unprofessional. Unless you are going for a very specific vibe (like a nostalgic styled photo that you want to appear from the 90s) try a more neutral set of presets. They literally add an overlay to your photo not taking into account exposure, lighting, and contrast. The result can often be a way too saturated and overly processed photo- which equals to an amateur.
Presets- do a similar function that they can change the vibe of your photo- but they take into account the original (and desired) settings. My favorite presets are by VSCO and Tezza. And the beautiful part of a preset is that you can pick one or two go tos that make all your pictures have a coherent theme. This allows your colors to be a universal identifier of you. And presets also allow you to have “true to color” items- so that if you are showing your jacket and want people to see the actual shade of green it is- this will not be affected (unlike with the standard Instagram filter).
TIP: Use an app like Preview or Planoly to preview your photo grid before you post to Instagram.
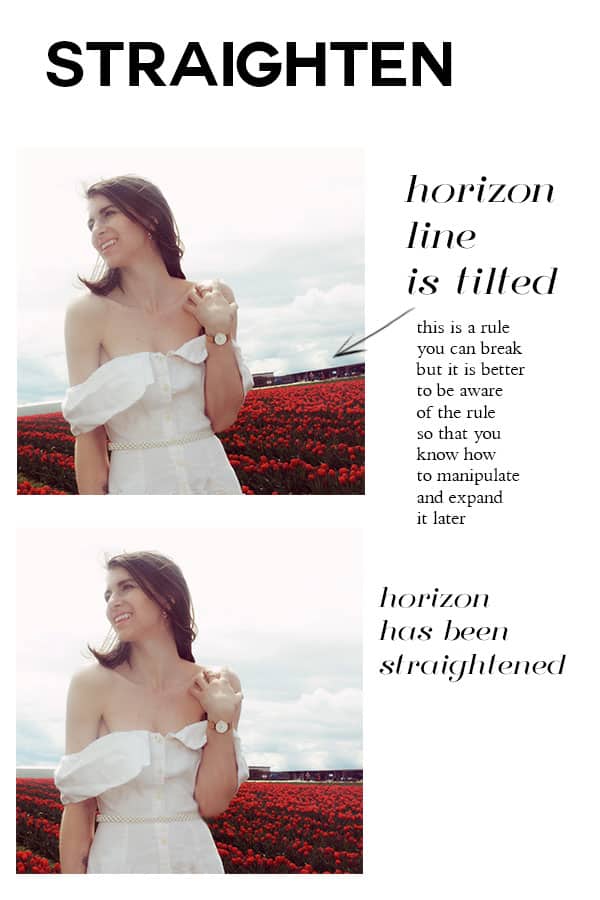
4. Straighten
This is literally the easiest one. All it requires is you to have enough space around your subject so that if you took a slightly askew photo (unintentionally)- you can correct it. I don’t know how many amazing photos I see on Instagram where the horizon line is so crooked (and not in an artistic way). This just makes the photo more professional. If after trial and error and experience, you want to play with the horizon line intentionally- go for it. But if you want a great shot- make sure your horizon lines are on point.
 This is especially key for wide shots. Closer up shots don’t have as obvious of a horizon line so they can be creatively crooked or unintentionally crooked and most people will not notice. However, any full shots or wide shots that have multiple elements in them that appear crooked will scream unprofessional. Every phone and almost every editing software out there has a straighten tool. It is usually found in the adjust or crop settings.
5. goal
Remember that this visual communication is important. What are you saying with your image? The best photos have a goal in mind before they shoot. It does not have to be a lofty one- like save the planet… But it should speak without a caption. (captions are very important, but we can discuss that later). You are a complex and multi-leveled person, and your images should be as well. They should tell people what you would tell them in words. It can be candid or curated- as long as it’s authentic.
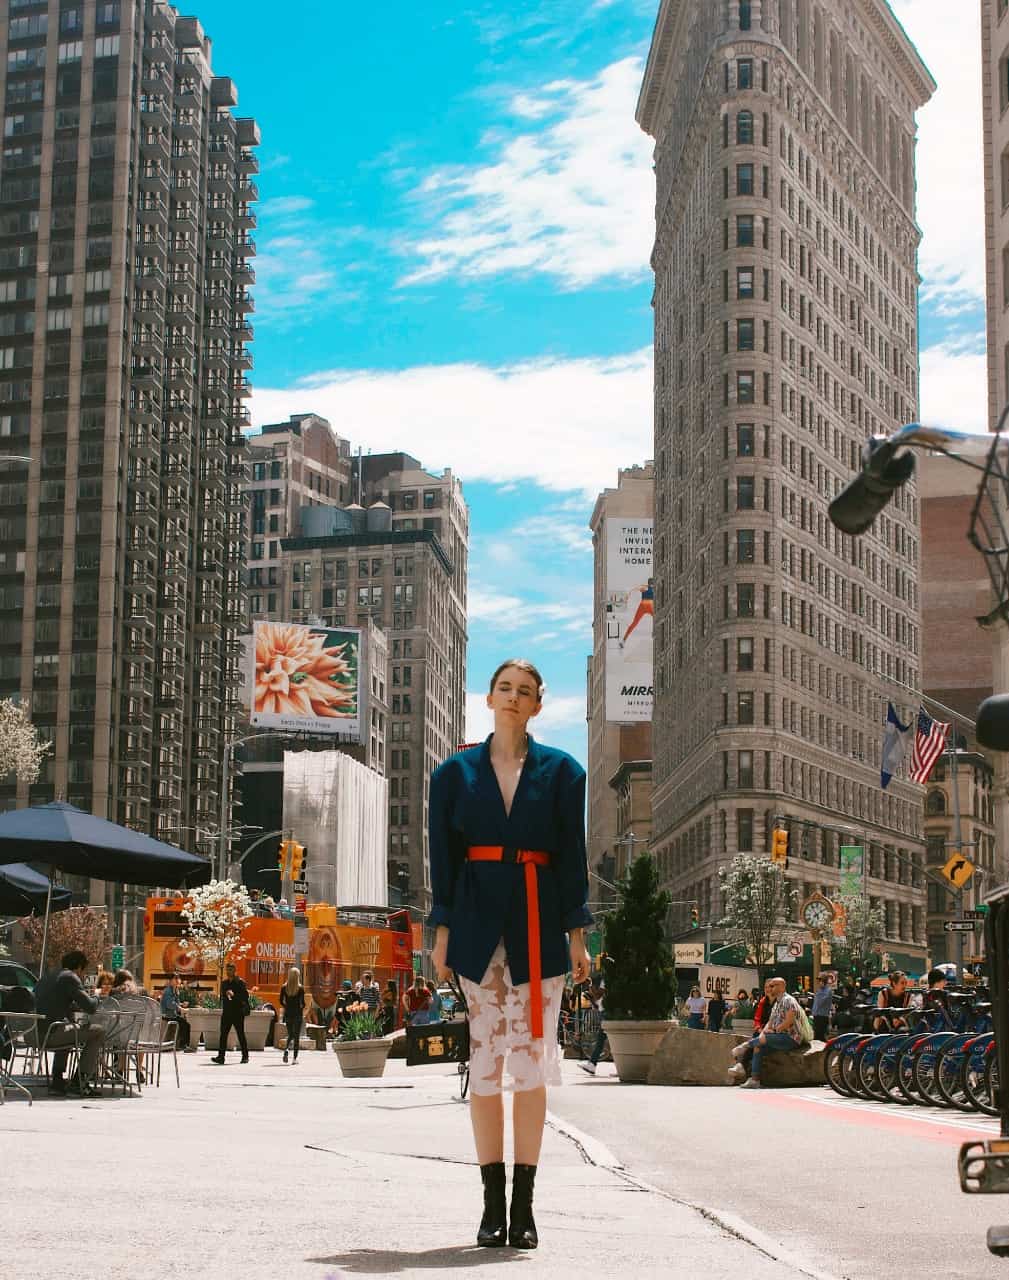
Curated does not mean it’s fake. If you do it right, it means you put in the effort to communicate this one though. In the example below my goal was to portray my love of fashion. It was to show that I am a NYer at heart, and while I’m not always confident- I always dress with confidence. Have a goal with your photo, have a message, and have point to your grid.
What do you want to tell the world that they don’t know? OR that they might need help with? What do you want to tell the world about yourself?
By using Instagram and these photography tips- I guarantee you will be more visually eloquent and have more success in your goals of communication. Take better photos for Instagram and embracing these simple steps for better photos, in general, will allow you to communicate yourself and your goals faster and will get you one step closer to your goals.
TIP: WHile Instagram presents in 1:1 or 5:4 ratio- do not shoot in that size exclusively… Better to shoot the image that is compelling and then crop later. Sizing yourself for only Instagram will limit your photography.
My favorite camera gear and tools that I use religiously:
Photoshop– They have a monthly subscription plan that is my preferred way to pay- it also included the most recent updates.
Tripods:
fits both iphone/smart phone and DSLR:

for your DSLR:

Camera’s I use and Love:

Be sure to sign up for the newsletter to hear my thoughts on social media, and more exclusive content that never graces this site.
[mc4wp_form id=”7172″]
Candice Cuoco
Monday 6th of May 2019
Sooooo Good!! Such good and NECESSARY information 👏🏻👏🏻👏🏻
admin
Monday 6th of May 2019
thanks babe! that means a lot coming from you- your pictures are just 🙌